
Home decor retail stores are filled with endless options of items for your living space, but nothing beats the satisfaction of creating a beautiful decor piece all on your own – especially at a fraction of the price. Take a look at the products in one of your favorite interior design stores and analyze the complexity of its composition. It is rarely a level of intricacy saved for professional artisans.
Next time you are window shopping, and pouting at the inflated prices, see if the coveted products can be recreated using dollar store items. Better yet, make some unique decor pieces of your own! Anything is possible with a little glue and paint. Need some inspiration?
Japandi Wooden Planter
Starting strong with a simple but elegant zen-style planter with slatted wood detail. Begin with an empty one-gallon paint can (if you want a smaller planter, go with the quart-sized cans) and grab a set of square dowels from your local craft store. Cut down the majority of the dowels to a little over 7.5 inches and cut nine of them down to 9 inches. Spray-paint the metal matte black to give it a subdued finish, then measure out and mark where the legs will be placed by dividing the bottom circle into thirds.
Hot-glue the dowels vertically side-by-side all around the cylinder while making sure they are snug enough that little to no black peaks through. When you reach the mark for the legs, glue down three of the 9-inch dowels, then continue normally with the shorter ones until the next mark. Once they are all glued down, wait for them to dry, then finish it off with a wood stain of your choice for a beautifully warm and natural feel.
Floral Picture Frame
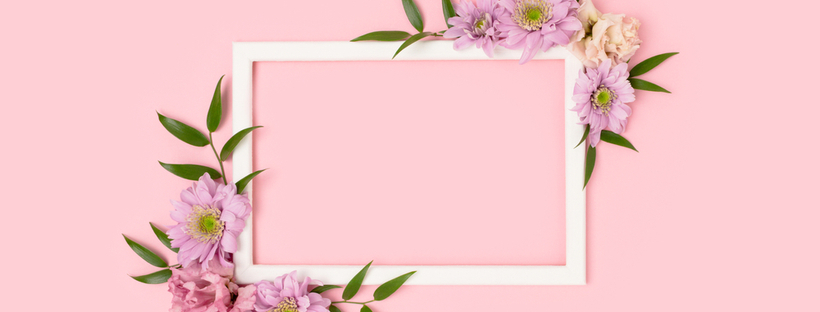
Spice up your gallery wall with a fun DIY decorated frame! All you need is a plain one from the dollar store and a few faux flowers. Pluck off the flowers and leaves from their stem and throw them in a cardboard box. Grab some gold spray paint and give the florals a quick topcoat. Do not be alarmed if they are not fully coated because the final coat will come later. Take the frame and remove the backing before laying out the flowers in whatever orientation looks best to you.
Once you are happy with their positioning, you can begin to glue them in place. To give it more dimension, add a couple of beads to the center of the flowers. Once everything is glued and dried, give everything a generous coat of that gold spray paint. It will be a lovely way to display any pictures or artwork you have.
Coastal Soap Dispensers
Find some simple ceramic dispensers from the dollar store or a thrift store. Apply a good amount of caulking to the outside of them and spread it around with your finger. To give it an earthy texture, take a course paintbrush and run it along the wet caulking. While it is still wet, apply some sand to the bottom third of the dispensers.
After a few hours of drying, take some white acrylic paint and mix it with baking soda to create a thick foamy texture. Paint the mixture along the white section of the dispenser and be careful not to smear it over the sand. Now, mix equal parts resin to hardener, which creates a thick glossy substance. Paint the mixture over the sand to solidify it and let the dispenser cure overnight.
Rustic Candle Decor
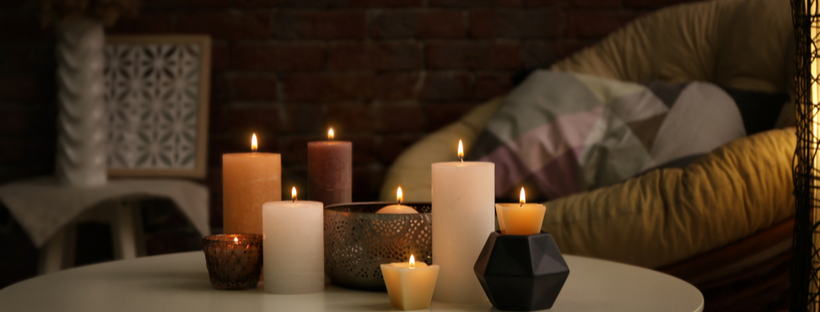
This is a great way to recycle some old candles or give new ones an upgrade. Fill up a pan with water and heat it over the stove. Place the candles in the water and heat them for about an hour or until fully melted. In the meantime, take two small ceramic bowls and hot glue their bottoms together. For an organic and handcrafted feel, use a terracotta finish spray paint over the entire vessel, but feel free to use whatever color you prefer.
Glue on a candlewick to the center of the bowl then wrap it taut around a dowel and balance the dowl across the top of the bowl to keep the wick straight. Once the candles are finished melting, carefully pour the wax into the bowl until it reaches the rim. Snip off the excess wick and it’s ready to get lit!
Trinket Tray
Once you get the hang of the process, the creative options are endless. The simplest version is rolling up a ball of air-dry clay and rolling it out flat. You can use a rolling pin or any solid cylindrical object like a food can. Once the clay is smooth, cut out a circle shape and lay the wet clay over the bottom of a bowl so it dries in a rounded shape.
Leave it overnight and once it has hardened, use some acrylic paint to make whatever design you want. Keeping it simple is the best option if this is your first attempt. Once the paint has dried, paint over the tray with a coat of Mod Podge to give it a clean finish.

No Comments